This post may contain affiliate links, which means that we make a small commission off items you purchase at no additional cost to you. Please refer to our Privacy Policy for more information on how we may use your information. As an Amazon Associate we earn from qualifying purchases at no additional cost to you. We appreciate your support!
Let's face it, grout – that porous, often stubborn material between our tiles – can be a magnet for dirt, grime, and stains. But fear not! With the right tools and some tried-and-true methods, you can easily restore your grout to its former glory. Get ready to bid adieu to those pesky stains and hello to sparkling clean grout!
You’ll see many options if you search online or at a store for grout cleaners, but I advise you to steer clear. Many of these grout cleaners contain harsh or toxic chemicals that aren’t good for you and can damage your tile. I would also steer clear of vinegar if you have natural stone. I love cleaning with baking soda and vinegar for a variety of uses and it can be great for grout cleaning, just test it first on a small area of your tile to make sure it won’t change the color. Let’s dive into a safe and effective method!
- Start with a Pre-Clean Sweep
Give your tile a good sweep or vacuum to remove loose dirt and debris. If it’s been awhile since you mopped, it would be wise to do so. This simple step prevents any loose particles from becoming a muddy mess when you start cleaning.
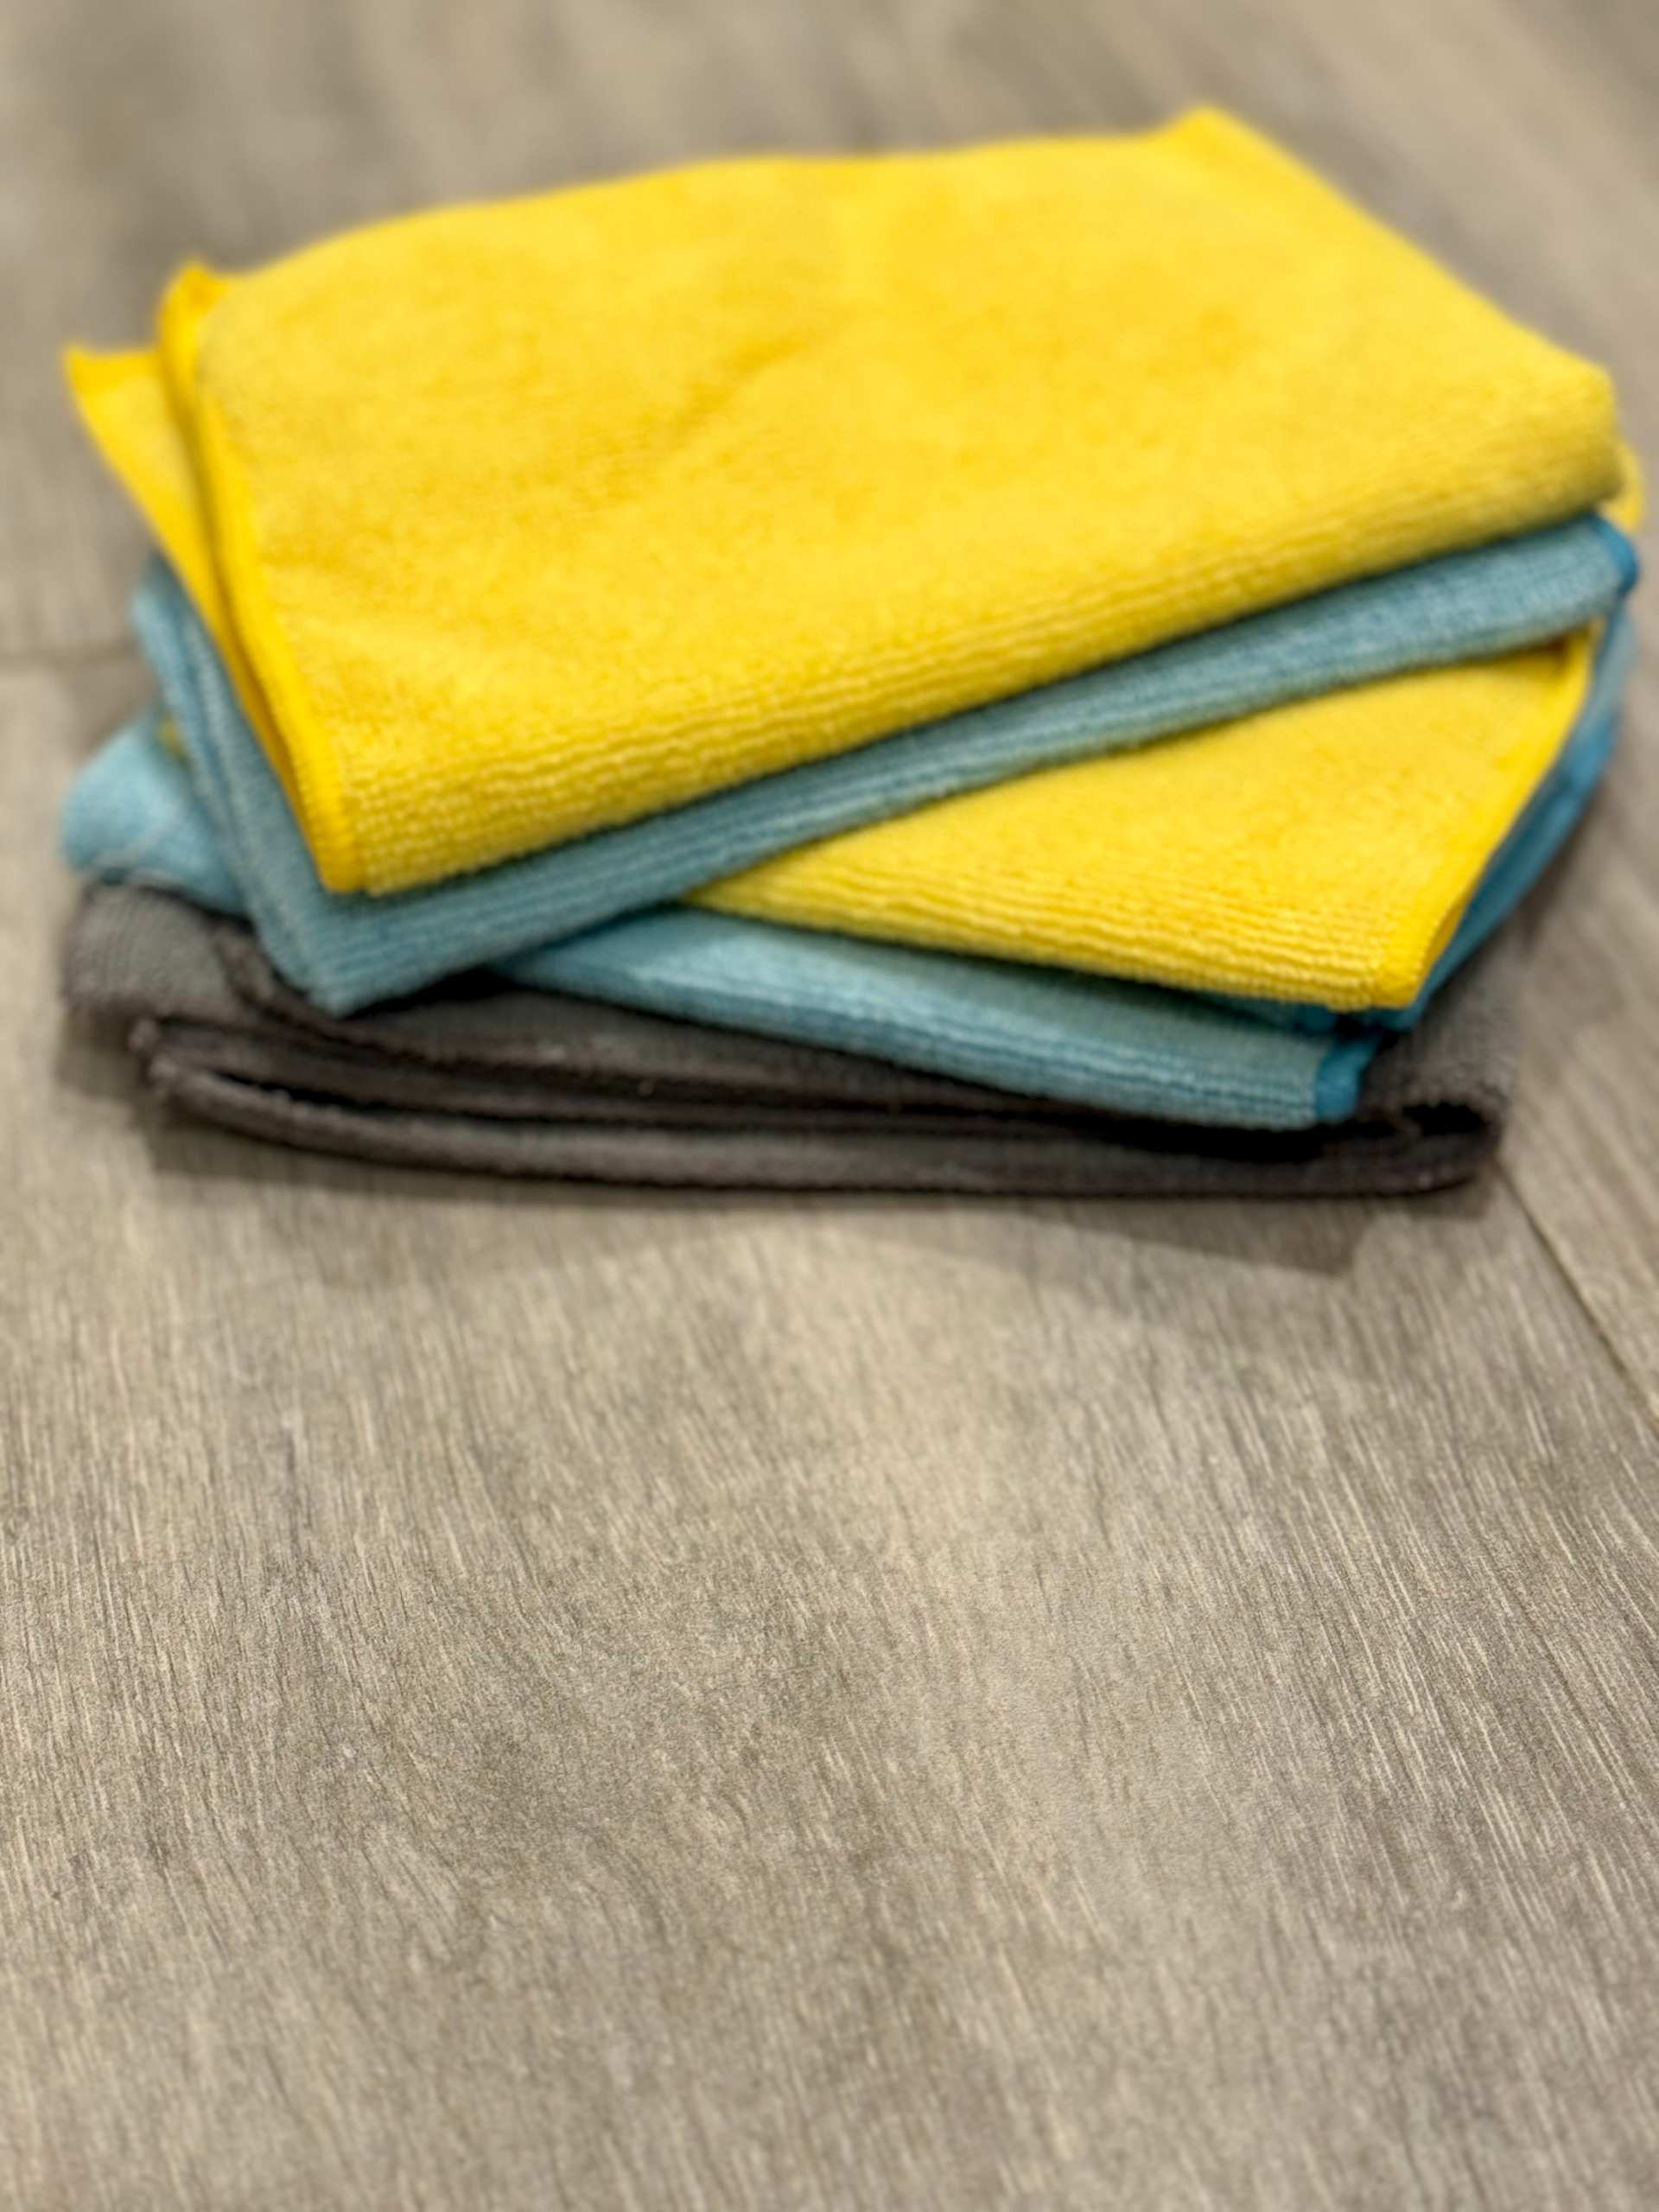
- Gather Your Weapons of Grout-Cleaning Warfare

Before diving into battle, gather your cleaning arsenal. You'll need baking soda, hydrogen peroxide, a toothbrush (or grout brush), a cup or bowl, microfiber cloths or towels, and boiling water.
Any brand of hydrogen peroxide and baking soda works great, just grab the cheapest you see at the store.
A small cup or bowl is best, as you’ll be moving it around with you to spread on the grout. I prefer a cup, and these silicone measuring cups are my go to for literally everything, including grout cleaning.
Personally, I like to use an electric toothbrush. The electric toothbrush gives more power to your scrubbing. Whenever I change out my electric toothbrush heads, I hang onto the old one just for grout cleaning. If you don’t have any extra toothbrushes on hand, you can get a pack of 30 toothbrushes for under $10 here.
You’ll see a lot of pricey grout brushes out there, and I’ve tried several. I feel like the toothbrush works better, so that’s my go-to. However, if you have back issues or can’t easily be down on the ground scrubbing with a toothbrush, this brush worked well for me and has a 50” extension handle so you can stand and scrub.
The boiling water will come later on and is optional, but makes a huge difference!
If you have a child around who likes to be a helper, grab them too! My 5 year old is a grout cleaning pro and is always down to scrub with a toothbrush.
- Make your grout cleaning power paste
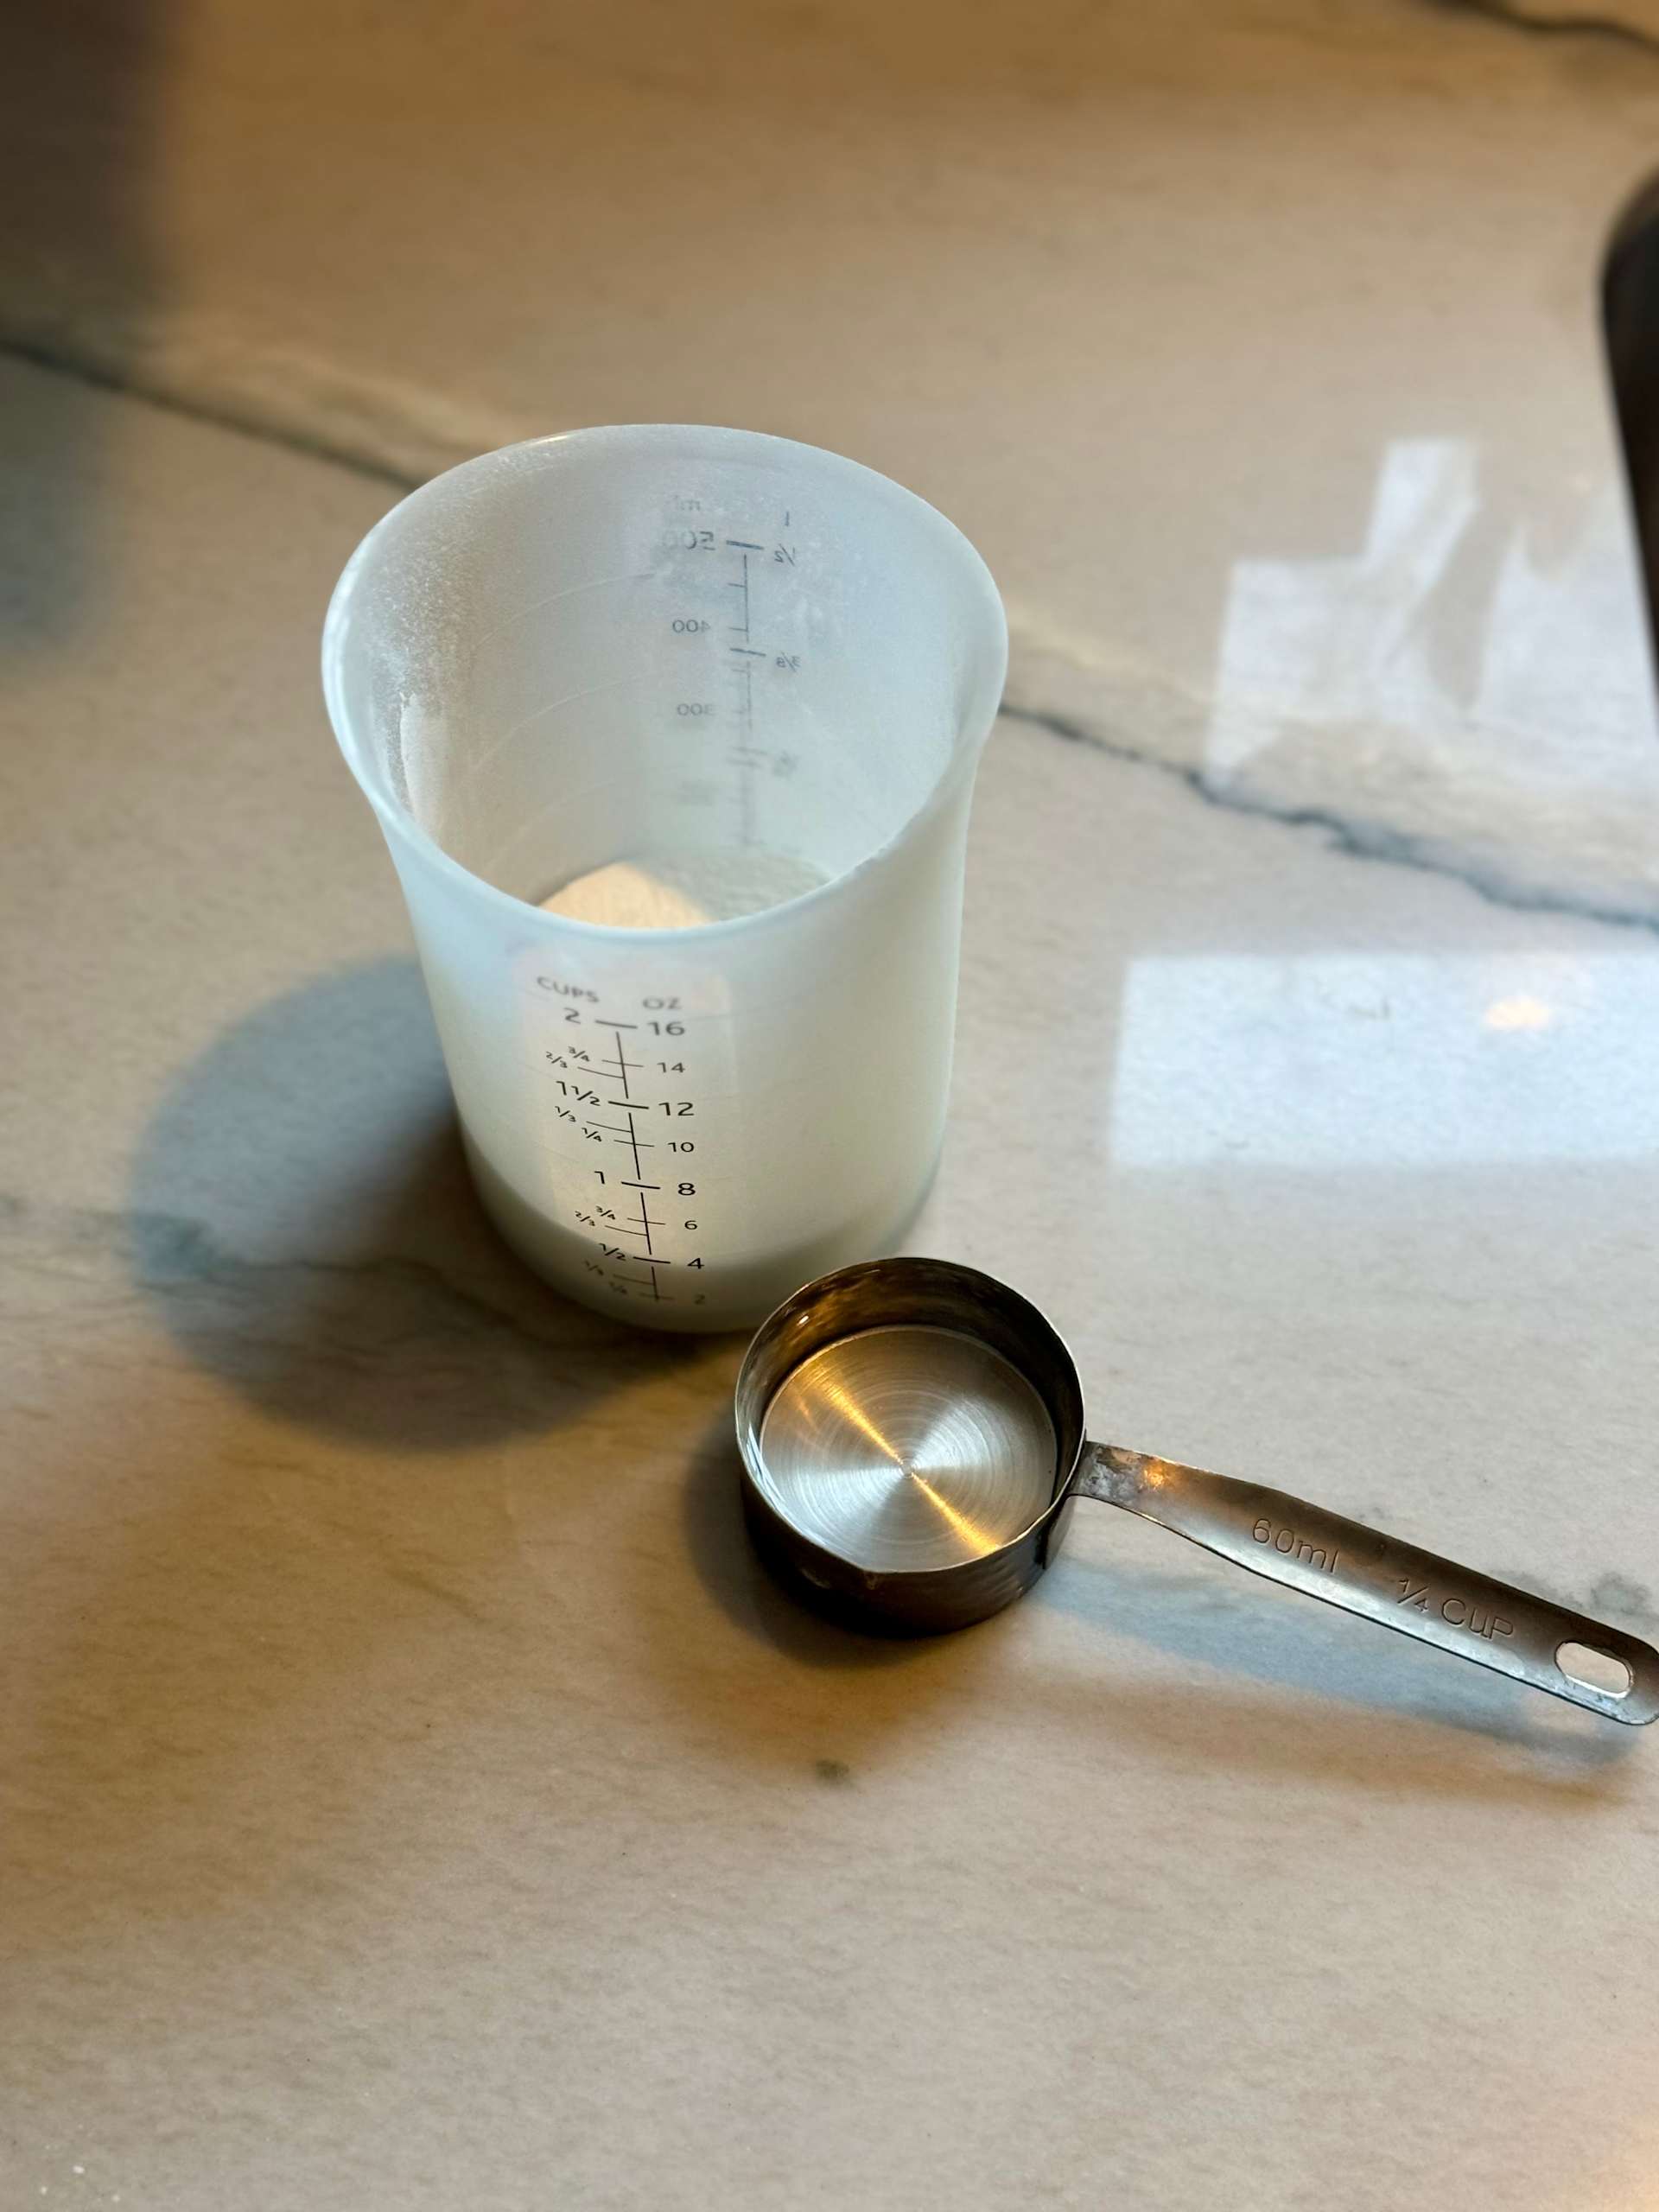
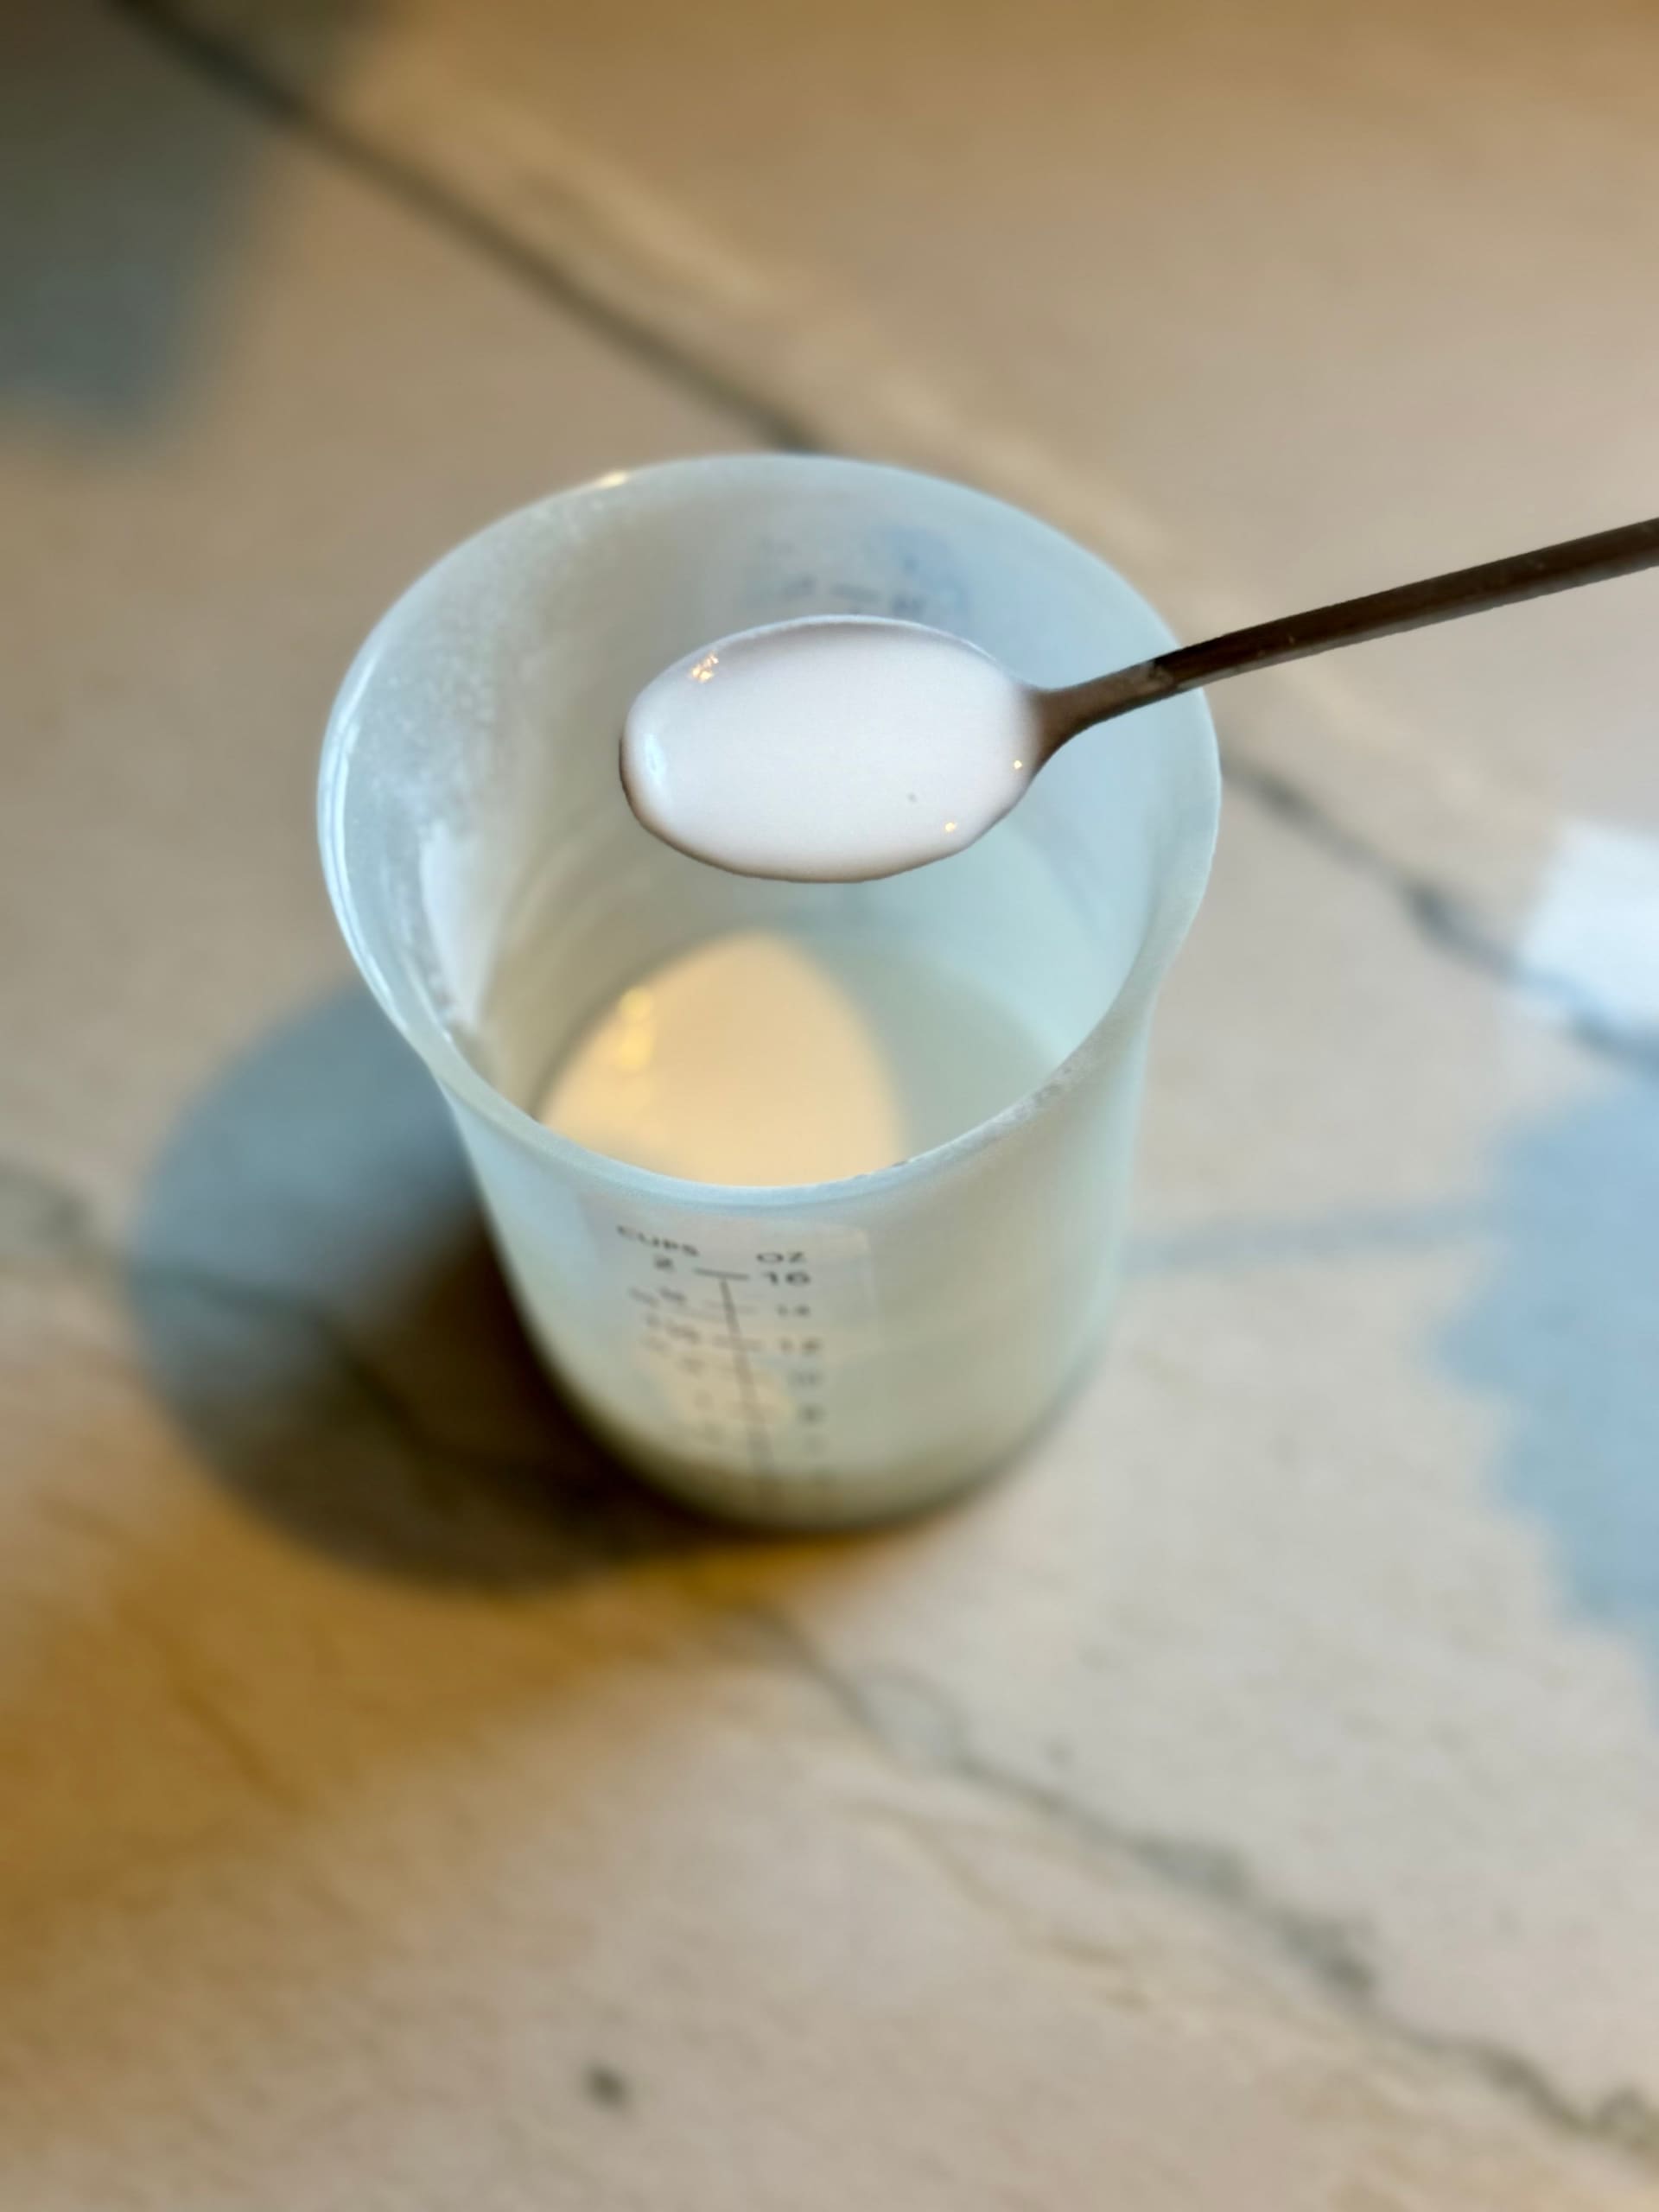
Create a paste by mixing 2 parts baking soda with 1 part hydrogen peroxide. For a small bathroom or area, ½ cup of baking soda and ¼ cup of peroxide should get you through it. For larger areas, double or triple that.
Once mixed, it should be like a thick liquid.
- Let’s get brushing
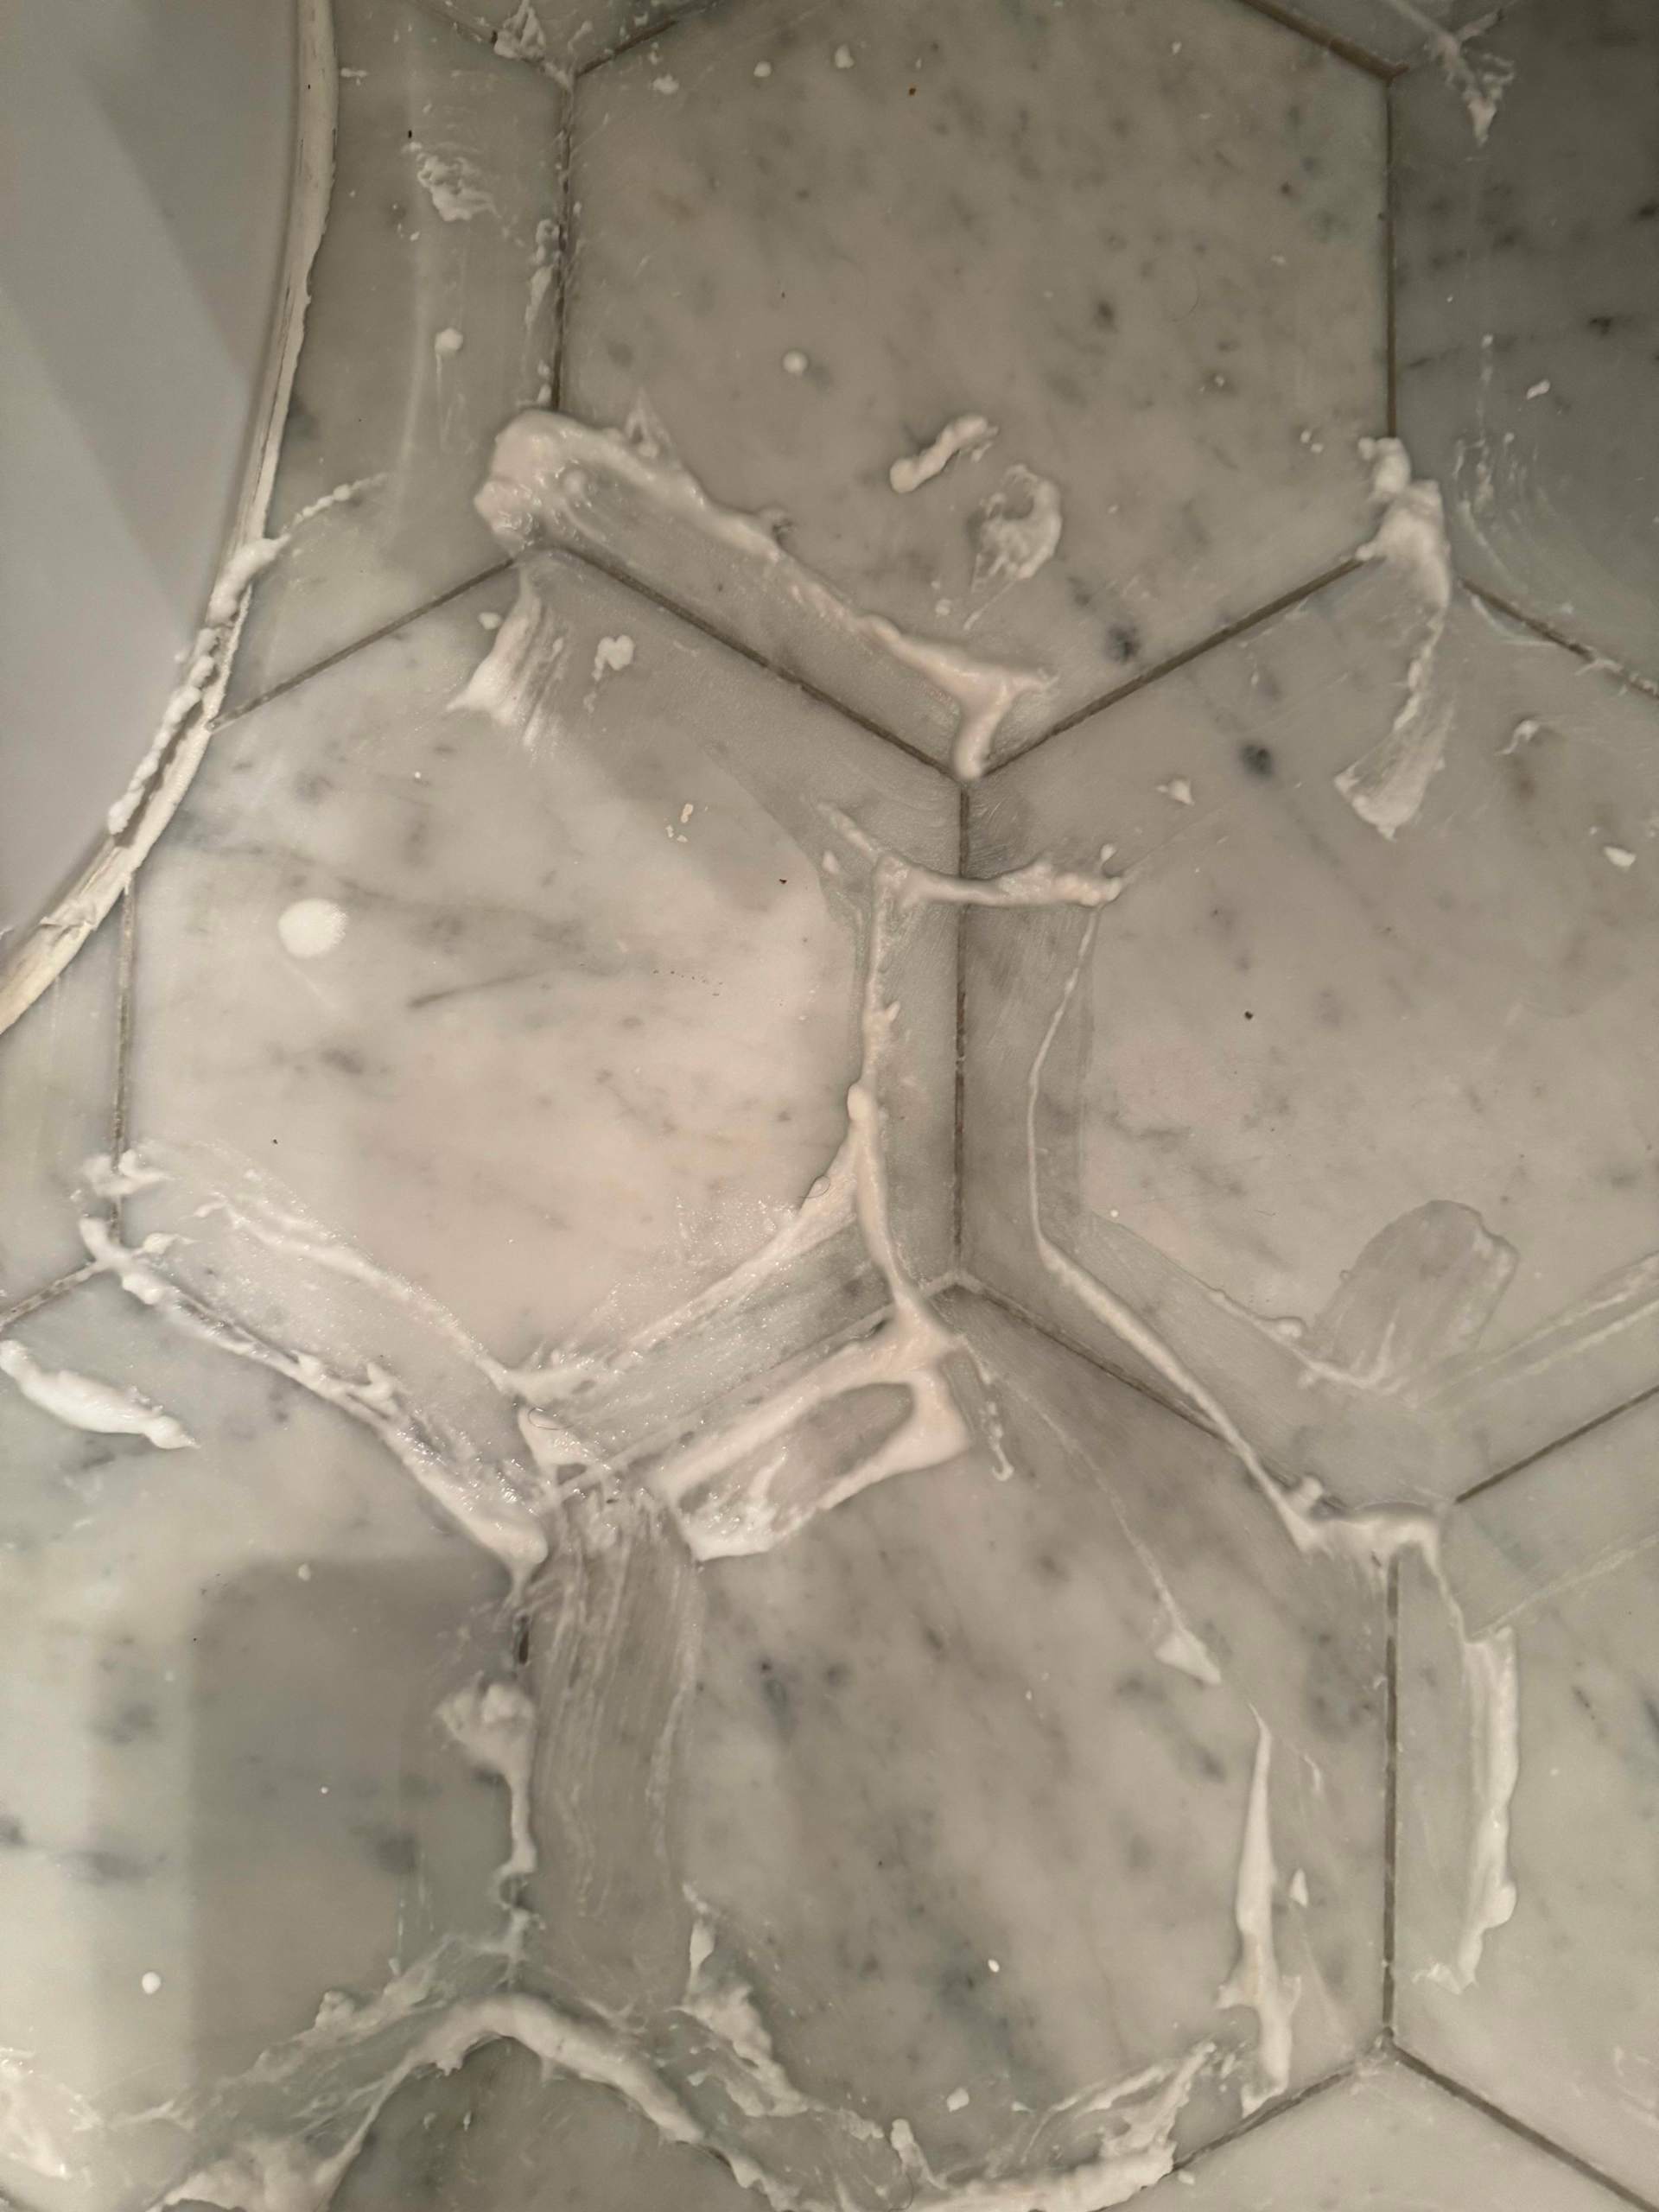
Scoop some of the paste onto the brush and spread it on the grout lines. Don’t worry about scrubbing yet, that time will come. For now just spread a decent amount of the paste on all the grout.
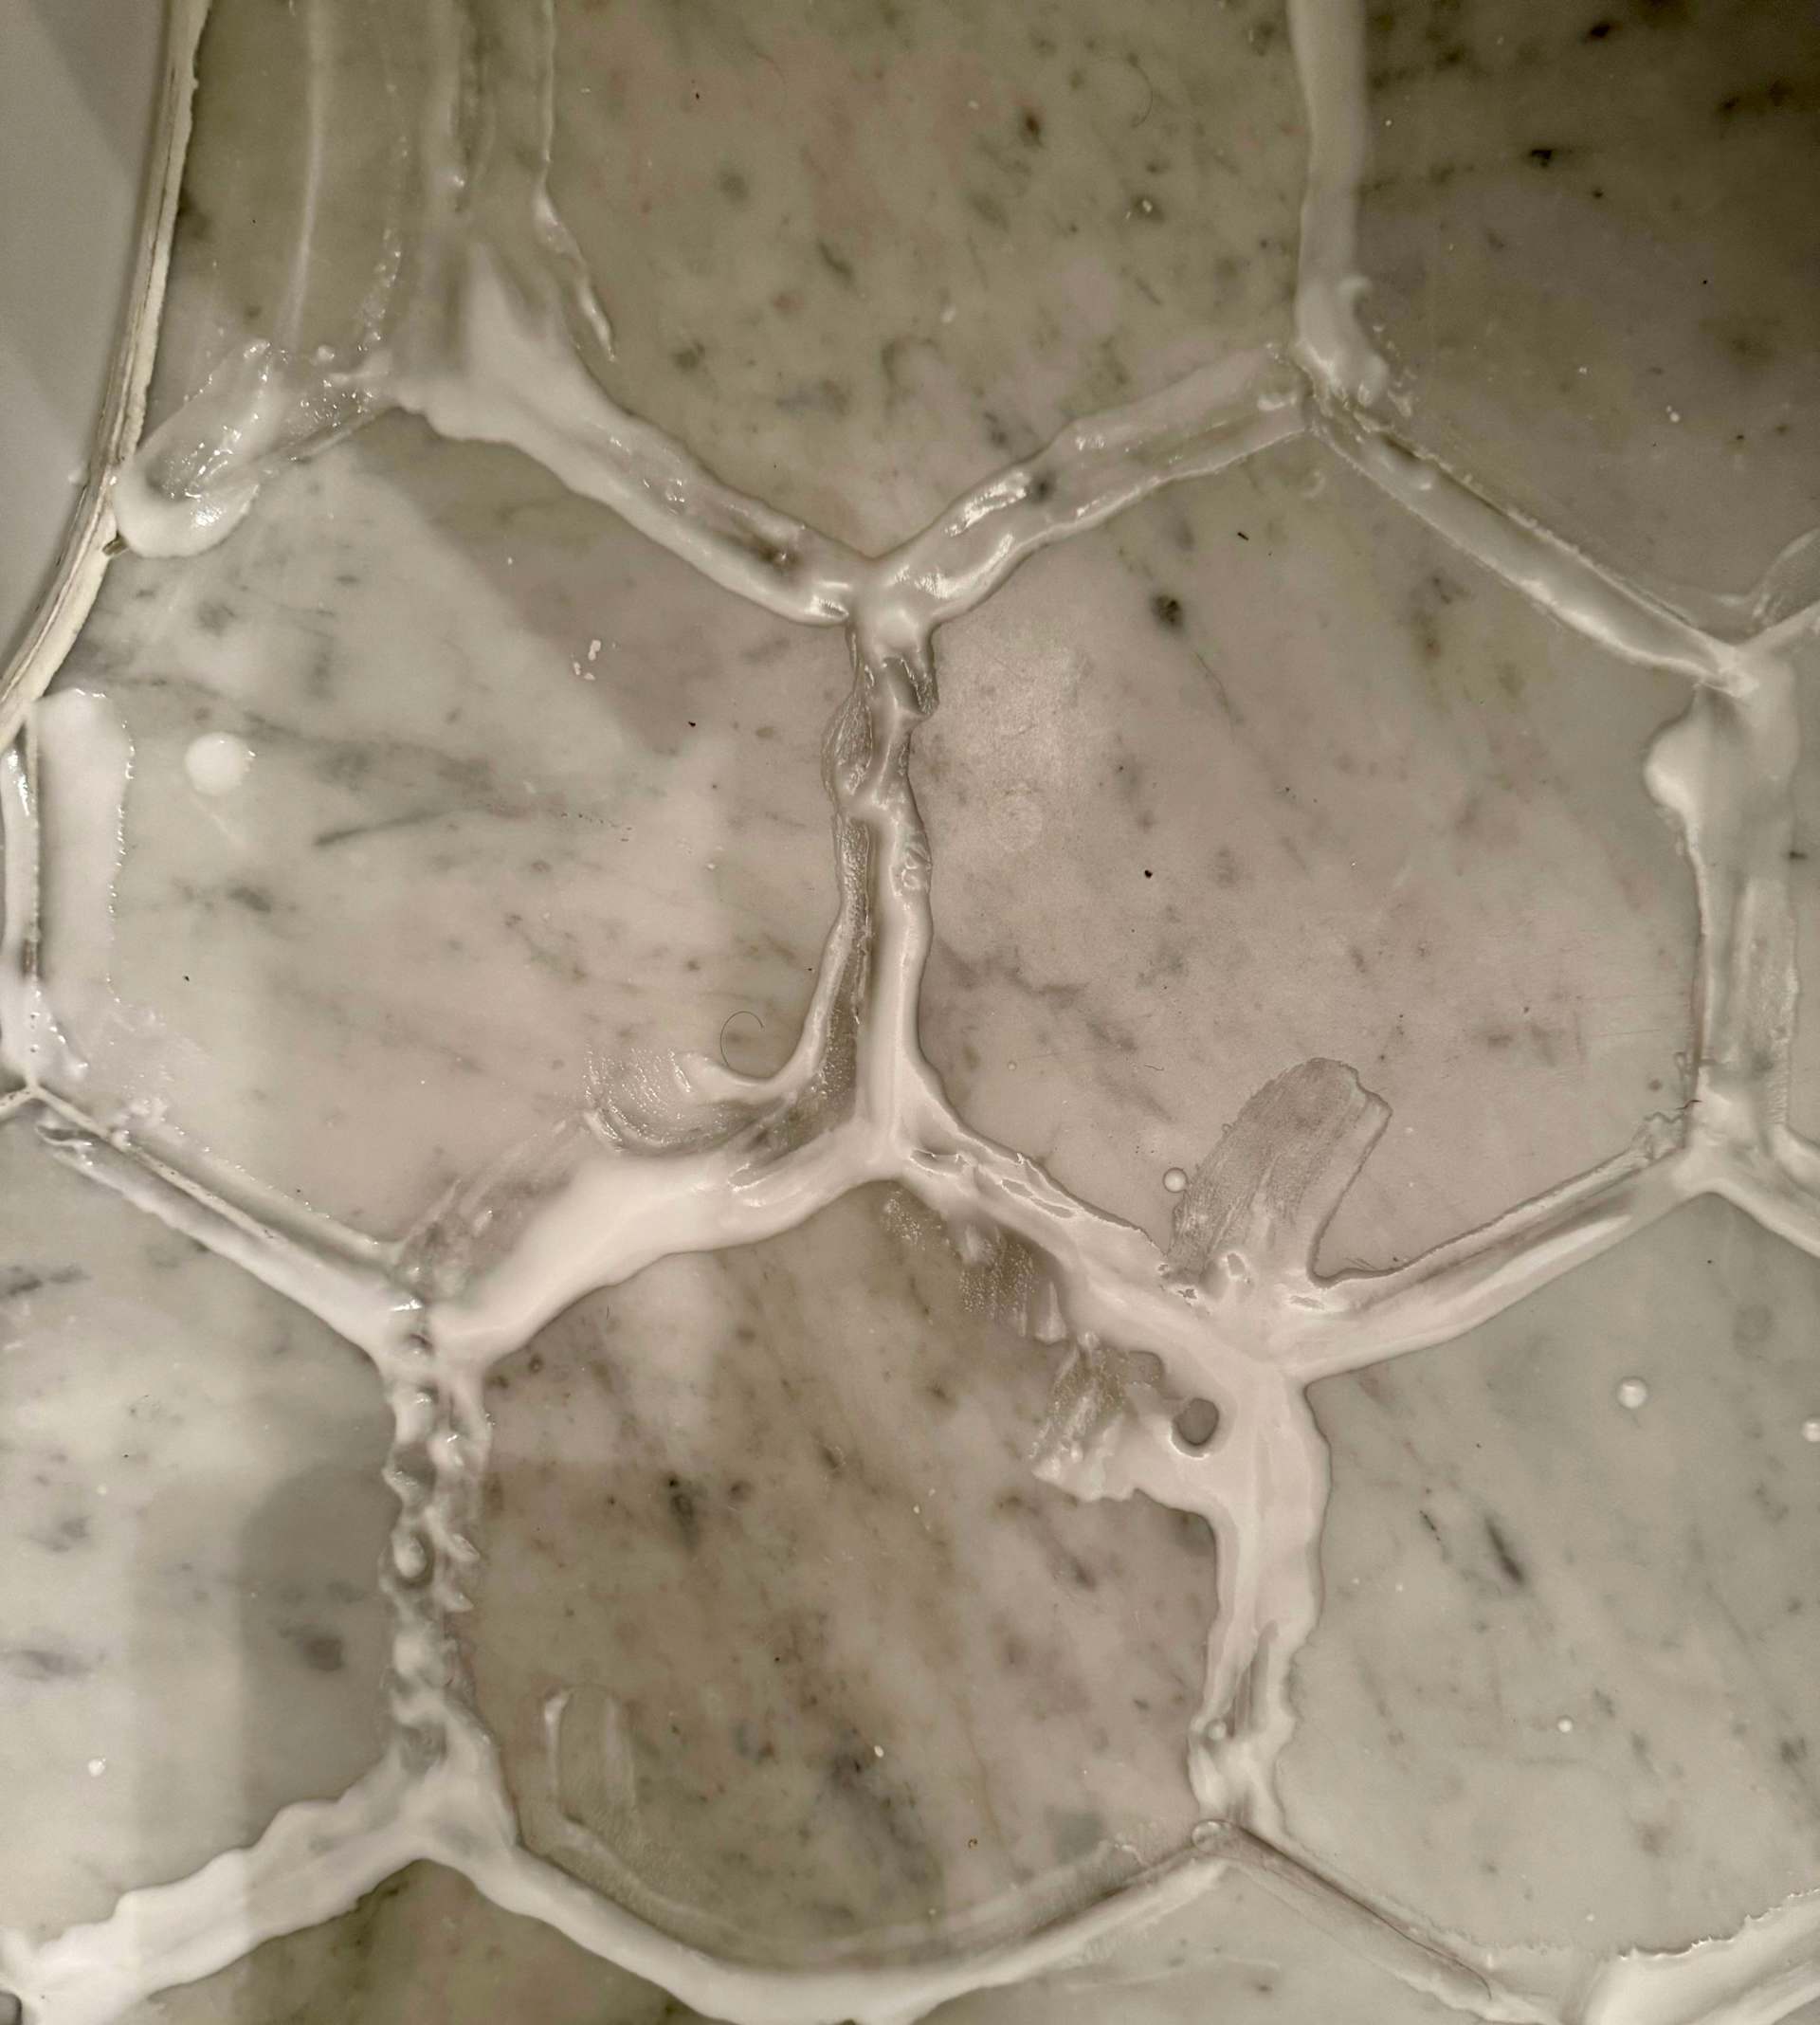
Let it sit for about 15-20 minutes, and then start scrubbing. I scrub in all the paste that has been sitting, and then dip the brush in the paste again and spread on another layer. You may see some of the paste change to a brown or black color as it’s lifted dirt from the grout. So grossly satisfying!!!
While you wait another 15ish minutes, boil a pot of water. I fill another silicone measuring cup with the boiling water and pour a small amount on each area of tile while I scrub a second time.
- Reveal the clean
I grab a dry microfiber cloth and wipe up as much of the paste as I can first before using wet microfiber cloths to wash away all of the dirt and baking soda. Once you have all the paste wiped away, don’t be disappointed if you don’t see much of a difference! Wet grout looks very different from dry grout. Give it some time to dry before evaluating the before and after!
If you see some areas that didn’t quite get as clean as you were hoping, just repeat the process and you can try leaving the paste on for 30-45 minutes this time.
6. Maintain the Cleanliness
Regular maintenance is key to keeping your grout looking fresh. Cleaning your grout at least every 6 months will prevent it from getting too visibly dirty.
So, want to see my before and after?
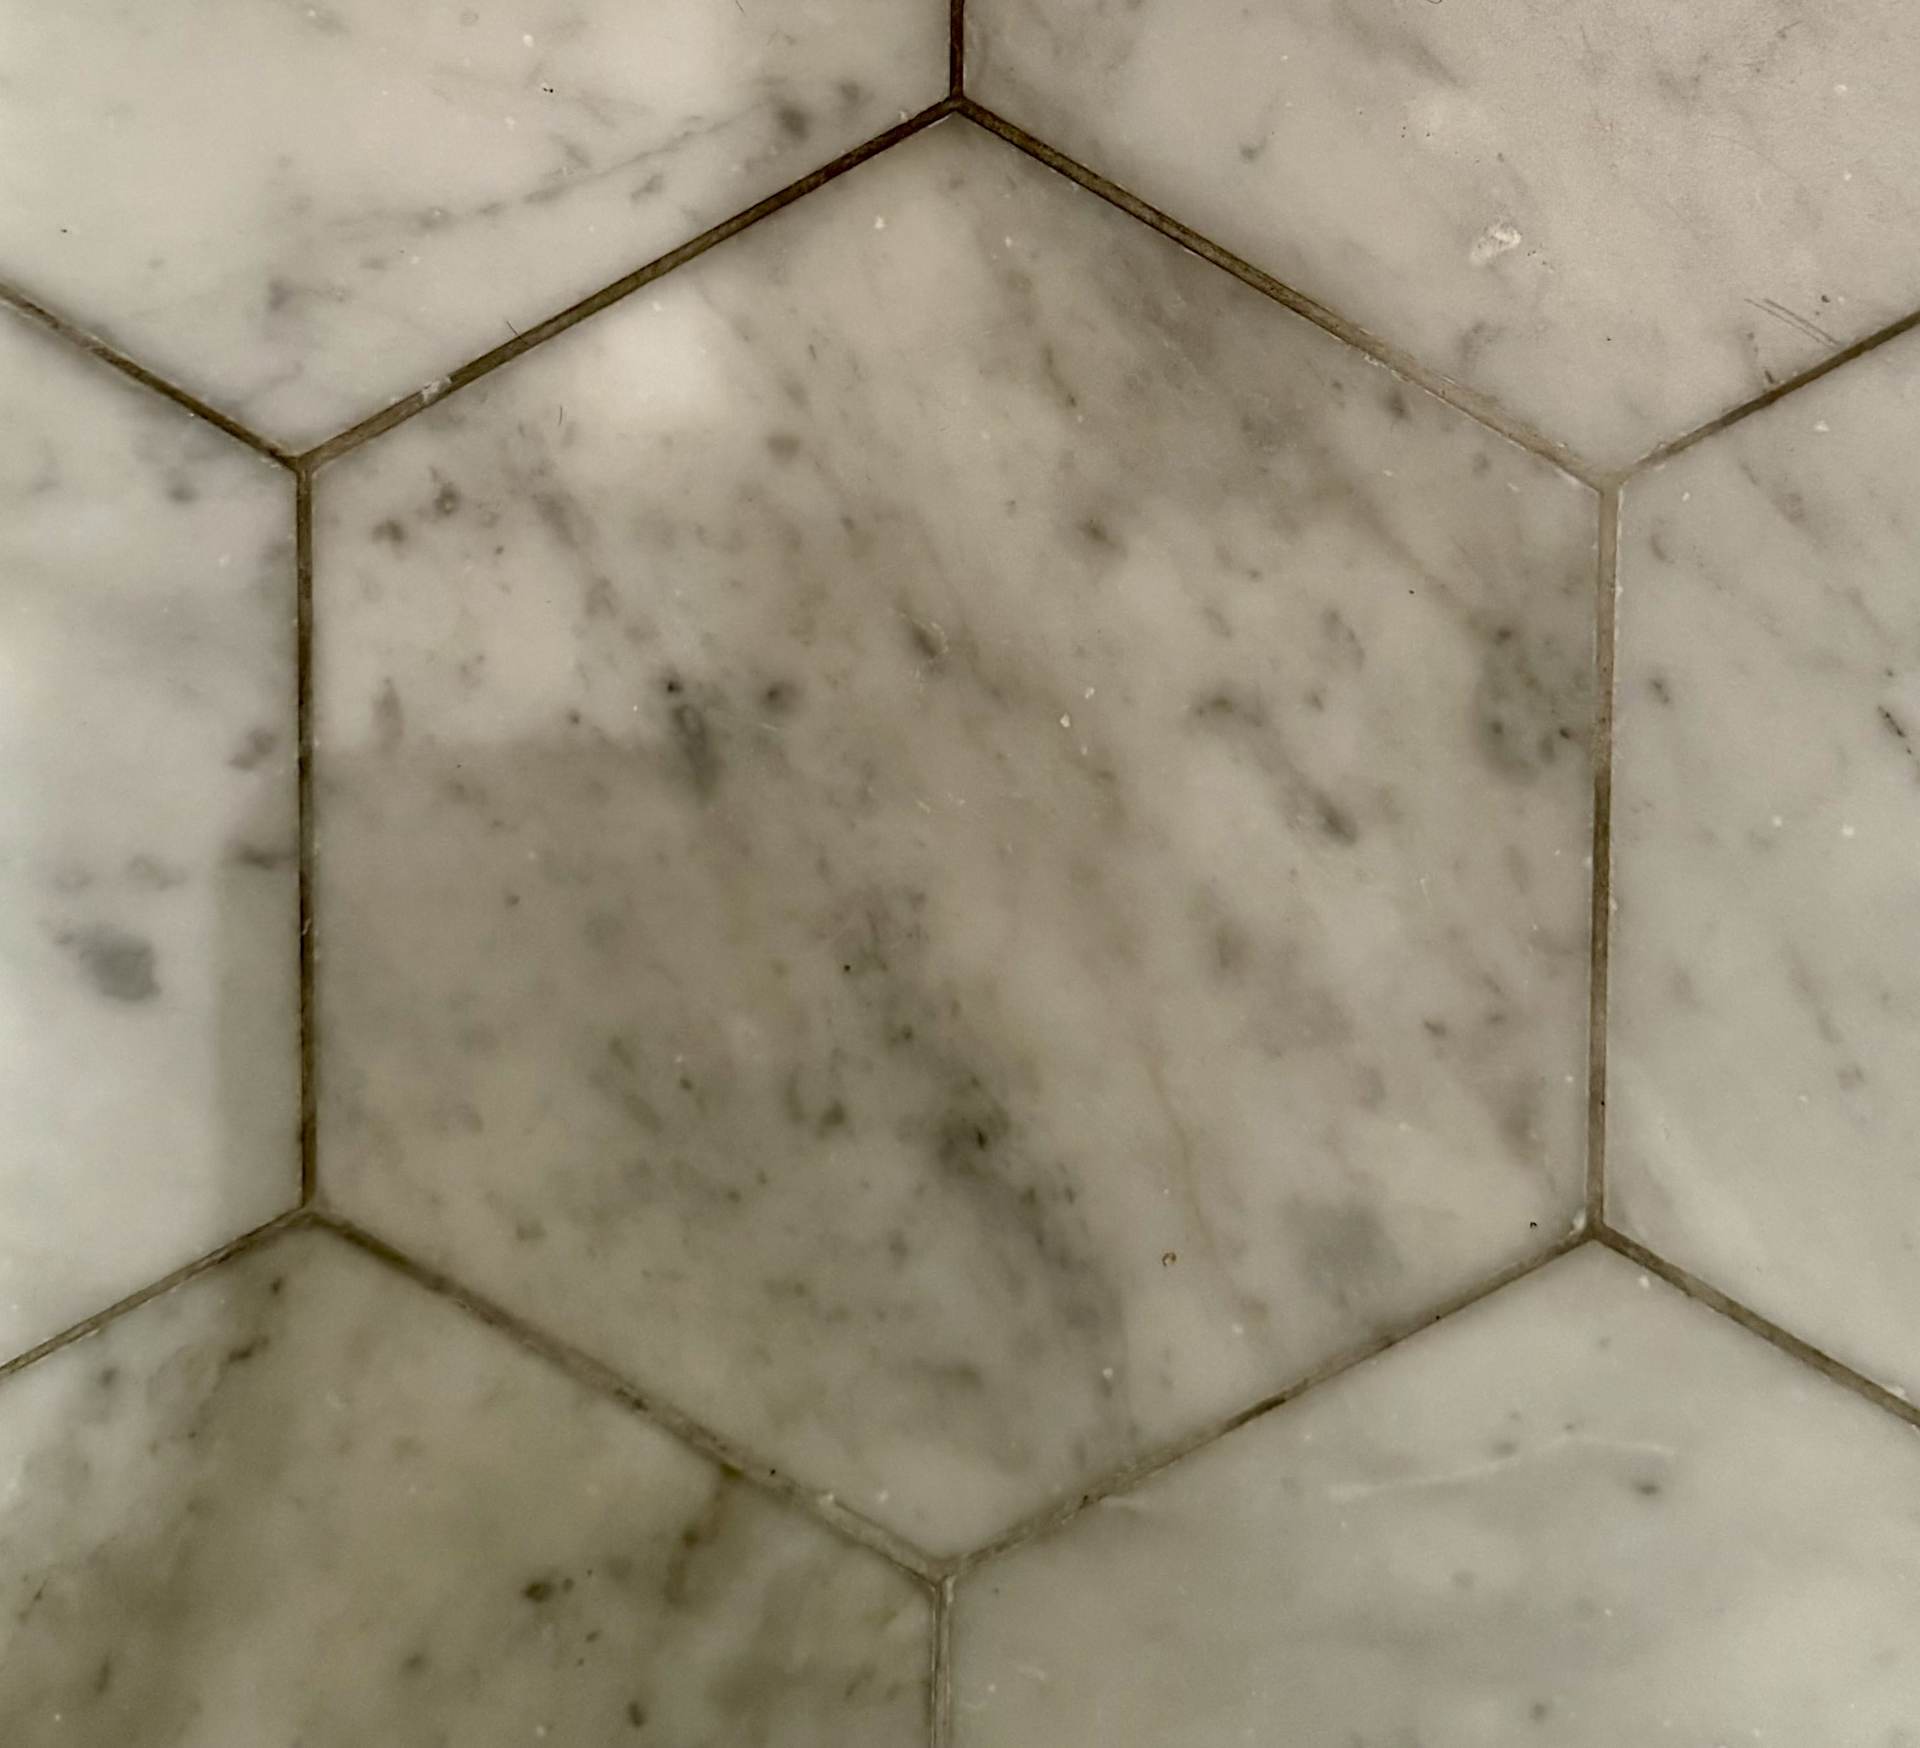
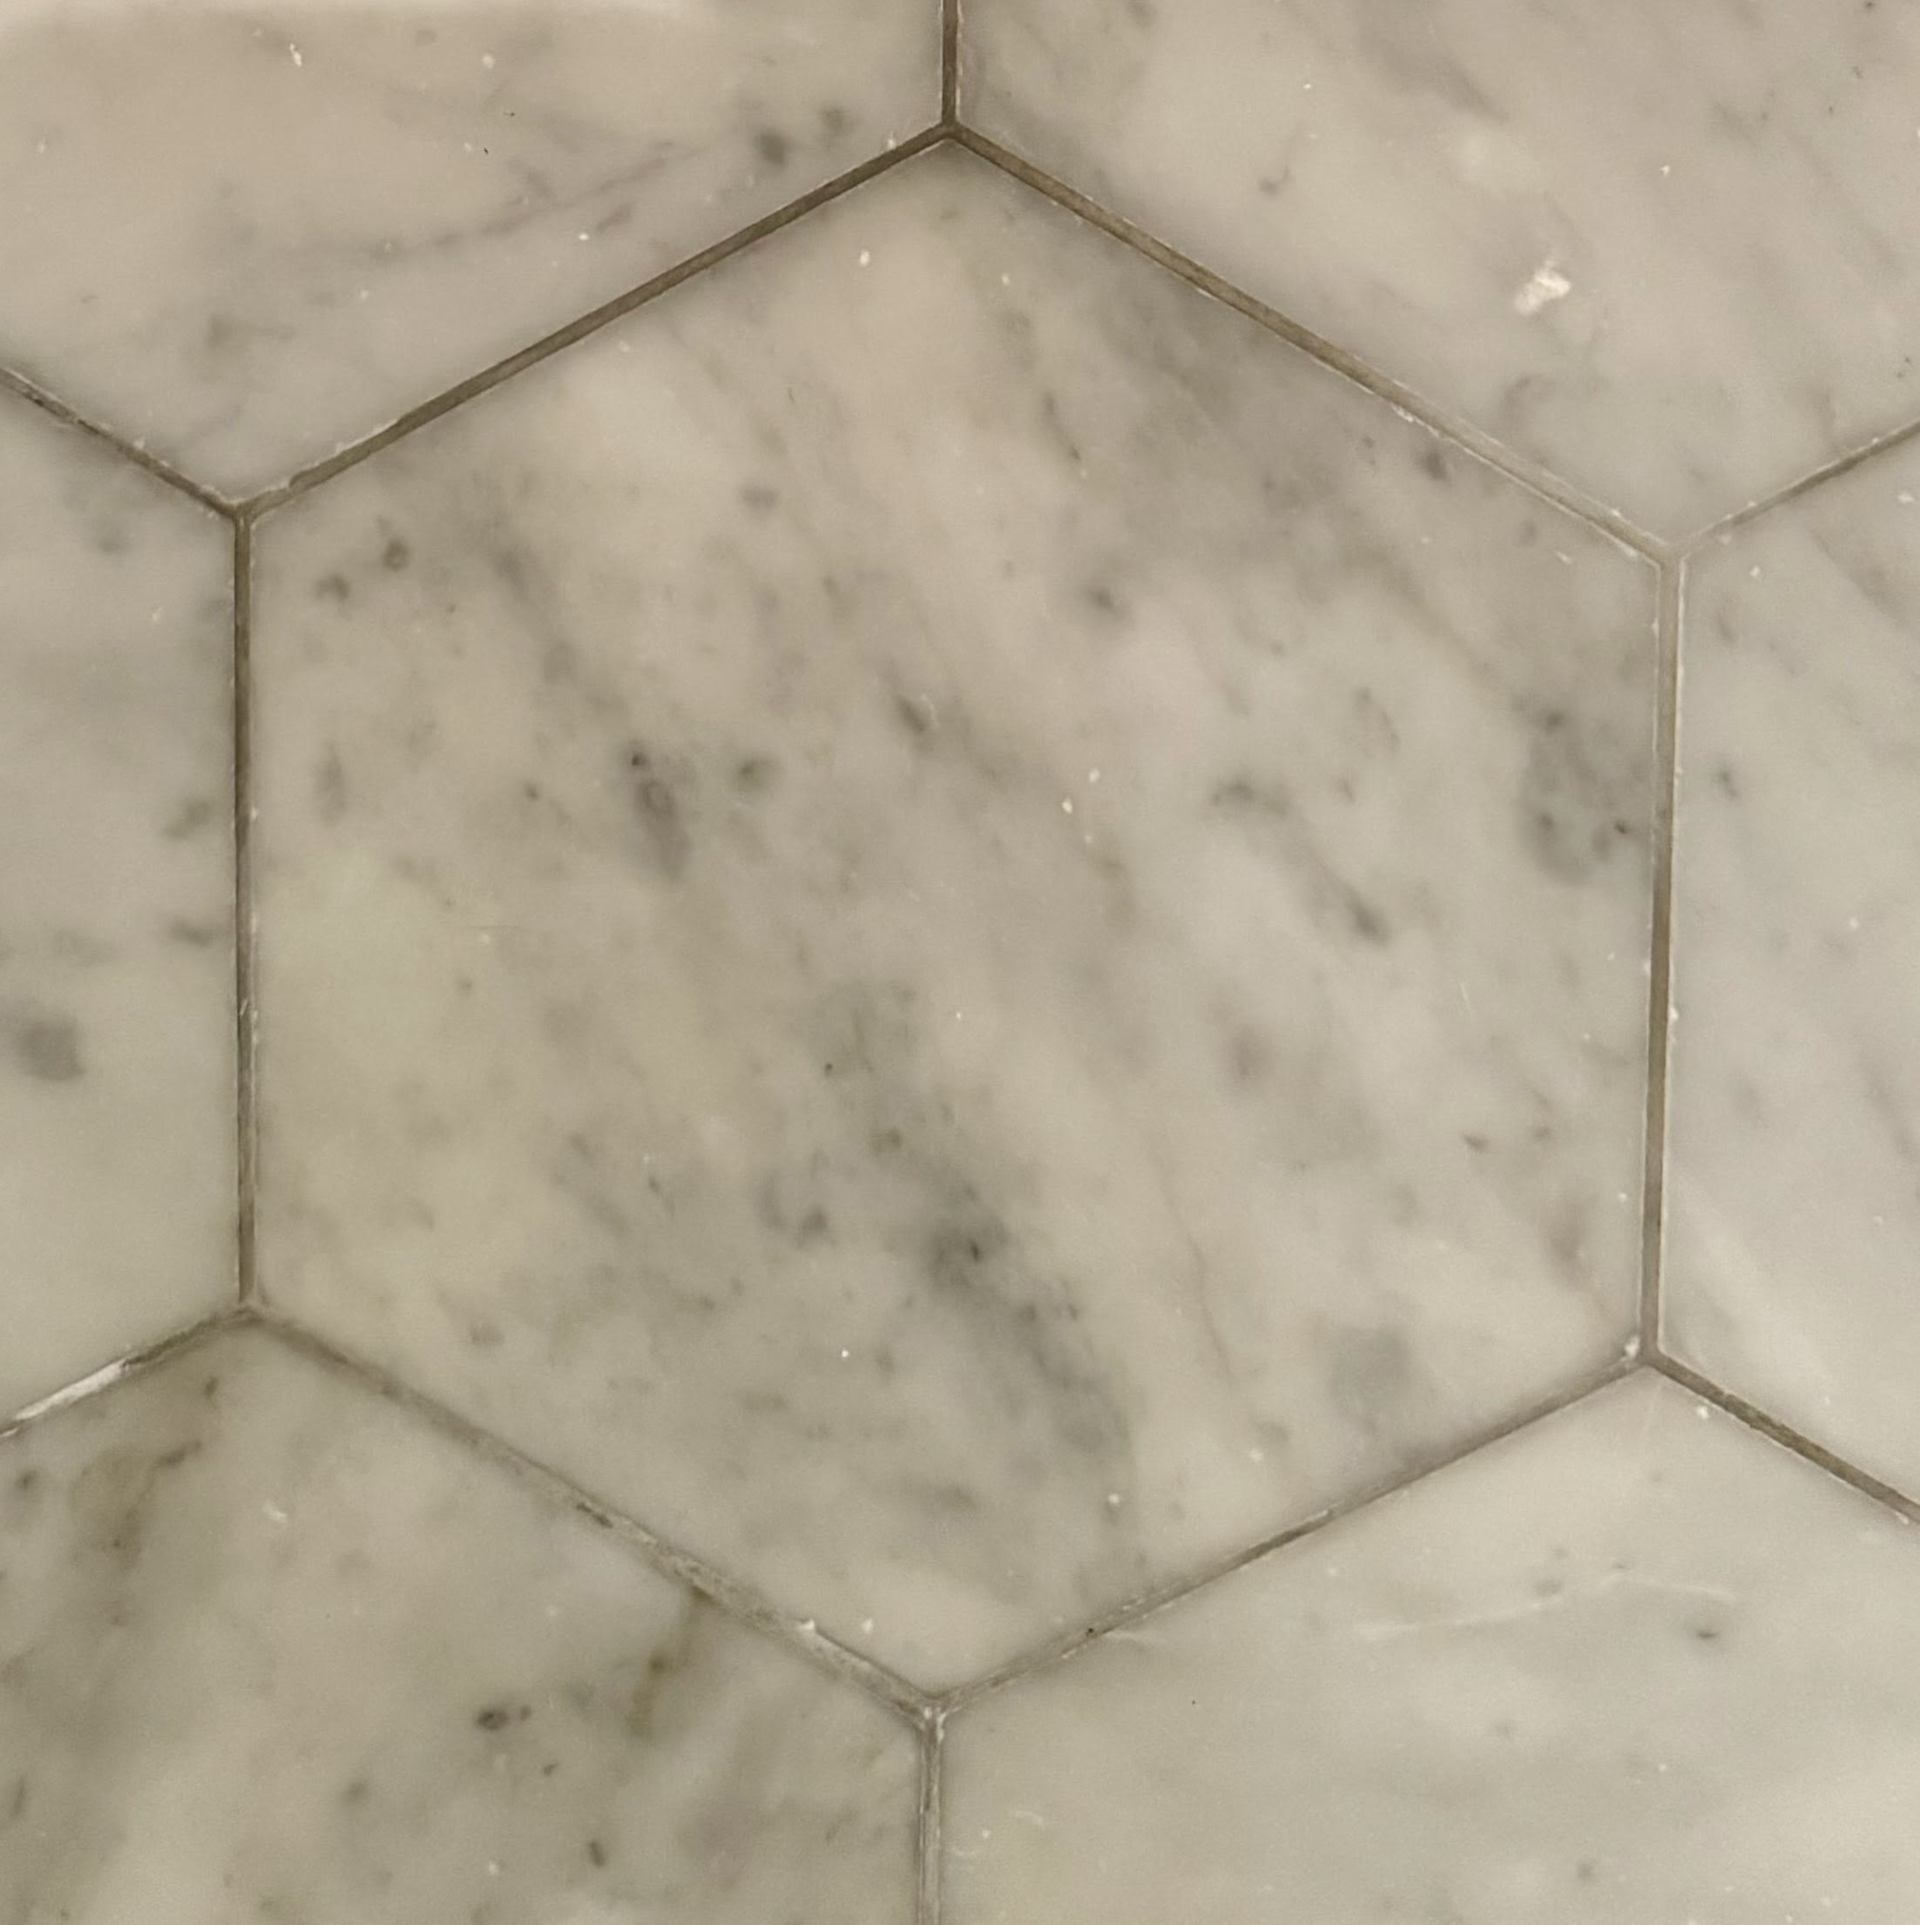
So much better! It's brighter and more elegant and just looks cleaner.
But wait, is this method safe for natural stone?
YES! The pictures you see in this article are of honed marble, and this method works great with no damage or discoloration! We do recommend always testing first though. If you have a dark marble, the hydrogen peroxide could have a discoloration effect, so please test a small area! If you see discoloration, then try using just a baking soda and water paste with a squirt of mild dish soap.
So, go ahead and show that grime who's boss. Your tiles and grout will thank you for the spa treatment!